Continuing on from the 3D face I have been building, it is now complete. Below is an image of the head in its final shape before the ear is attached. The ear is modelled separately then attached later.
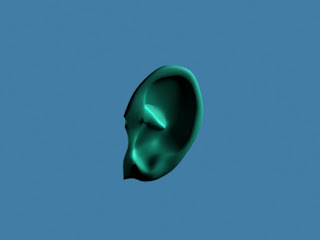
Carefully following the reference planes, the ear is modelled by extruding edges from a plane shape.
After a long time spent, the ear is smoothed with the mesh smooth modifier and is ready to be attached.
When the head is in editable poly mode, the attach option is available by right-clicking. This allows the ear to be joined to the head model so they are one shape. Using target weld (as used extensively throughout the online tutorial), the ear is attached.
While building the head model, I did come across a few problems. The most notable was, after much confusion, realised my model was built inside out. This affected the hair modifier used and any lighting setups. This was overcome by applying the 'normal' modifier.
By creating a sphere (and cloning it), an eye can be placed inside the head. The eye material I used can be found at:
[Internet] [Accessed 17/02/2011]
Applying a skin and lip texture makes it look a little more realistic. For the lips, I used Photoshop to change the hue of the skin texture. The texture can be found at:
http://www.filterforge.com/filters/547.jpg
[Internet] [Accessed 17/02/2011]
By adding a hair and fur modifier, found in the usual modifiers list, hair can be added. I set the colours to black with a specular tint of grey in the parameters and then enabled styling mode where you can essentially brush the hair. The hair length and thickness were also modified in the hair modifier's parameters. To select only a part of the model to have hair, use the face select option in the hair modifier and choose the ones you want to use, then click update.
Once again, the tutorial I used to model this head can be found at: http://www.secondpicture.com/tutorials/3d/3d_modeling_of_a_human_head_3ds_max_01.html
[Internet] [Accessed 17/02/2011]
And finally, I attached the head to the body I had made previously by going to the 3ds max logo > import > merge and selecting all the components.
Doing this has certainly made me appreciate all of the extremely high quality models in games and film today. I am satisfied with how he looks, but it is definitely a far cry from professional! Hopefully I will find a way to use this in my animation, but i'm not sure if it is taking too long to render.


A super model - great work!
ReplyDelete