With this module finished, a new blog with new subjects awaits. Follow the new blog linked below if you are interested...
http://alexchapman-ve.blogspot.com/
27 September 2011
6 April 2011
Final Product Evaluation
As a final entry to this blog, I will evaluate the finished animation and reflect on the module in general.
Scene 1 - Laser
This first scene looks good, particularly the animated laser and character equipped with a biped system. The sound effect accompanying the laser is also effective along with the particle system making the smoke.
TV screens can be seen right at the start of the clip playing the 007 intro from the films. Due to the camera angles, the TVs can't be seen very much. I would either move the objects or aim the camera towards them a little more. If I had more time, I would have also added a bit more detail to the characters in the observation room.
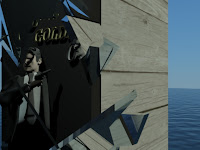
Scene 2 - Title and Glass
The gun animation and accompanying sound effects are good, as is the soundtrack increasing in volume as the word 'Goldfinger' appears. The daylight system required for the ocean made the text, gun and character bluer than I would have liked, but looks alright. There is a nice effect on the glass shatter, but more segments would be better. I was purposely going for the effect of a bullet being shot and the glass shattering in slow motion, but it is too easily mistaken for incorrect animation.
Scene 3 - Ocean
The daylight system makes the light reflect off the water surface very well and the motion blur is good on the bullet. The boat floating in the middle was a bit out of place, but I wanted to add some character to an otherwise straightforward scene.
Scene 4 - Coastline
The angle of the camera which reveals the mountains is effective, yet necessary. If the camera was above the ocean and facing the mountains, the point where the two objects meet is very obvious. This scene has pleasing aesthetics, but little happens in it to comment on.
Scene 5 - Car
The mountains and modelling of the car are the main focus of this scene. The animation of car could be improved by adding more points in the path constraint, making the movement smoother. Another way would be by using Reactor's toy car system. I tried with it, but couldn't get it to work well enough to include it in the final piece. Perhaps more motion blur could have been added to the bullet as it passes the camera.
Scene 6 - Car Corner
The superspray particle system worked OK for the car skidding around the corner, but could be better. The system could be improved by adjusting the parameters so the snow falls more naturally and looks less clumped.
Scene 7 - Final Credits
This scene works well and think it is a more creative way of showing the text. Using the car to reveal the Photoshopped image worked well and using reactor to drop the gun and bullets was a nice touch.
What I like least about this scene is the way one of the dropped bullets comes to rest right over the word 'Sean'. This wouldn't be acceptable for a commercial trailer as it blocks key information. This would be fixed by increasing the length of time reactor animates for before clicking 'create animation' on the toolbar. The short length of the reactor animation also made the bullets stop rolling too abruptly.
Overall I have enjoyed this module and I think I have produced a satisfactory animation that I am pleased with. I have definitely worked my way up a steep learning curve, but feel on top of it and ready to continue learning. Hopefully the work produced and experience gained through the module can help in future modules and career pursuits.
Model Evaluations
Model 1 - Car
Possibly my favourite model that I have done, the DB5.
 I like the overall modelling of this and I think the shape and detailing such as the reflective wing mirrors and vents are the best achievements.
To improve this model, I would first redo the front headlights. They just look too cloudy and should have a chrome trim. I could also use a target spotlight to produce actual light from them. I think the material used on the windows is too reflective, so I would make them more translucent by decreasing the reflection level.
Model 2 - Character
This model was used for Bond, then copied and adjusted for Goldfinger.
 The main strength of this model I think is the face structure which looks relatively realistic.
As for improvements, first off would be the body detailing. I don't like the shape of the jacket around the neck. Also, by modelling the character with baggy clothes, the biped didn't work fantastically. When the arms dropped to the side to walk they would intersect the body noticeably. To fix this, the character would be modelled 'naked' and clothes would be added later.
Model 3 - Gun
Another of my favourite models, just unfortunate that it can't be seen properly in the 2010 version of Max.
 The best part of this model is how it can be fully animated with a working bullet chamber, magazine and trigger.
To improve on this model I would fix the handle. The darker grips are too flat with corners on the back. On a real gun, the grip is a more rounded shape to fit the palm. There are also a few minor smoothing errors. These would be fixed by just spending more time using smoothing groups.
Model 4 - Laser
The laser is animated in the first scene of my animation similar to the film.
 I think the rings and cylinder at the top that glow blue work well.
As I was trying to stay faithful to the film, the red laser should be visible down the length of the machine. This would be fixed by making the cylinder inside the blue rings glow red like the laser beam. A simple fix, but I forgot to change it and it doesn't look bad as it is. I would also change the material of the wood on the table as it doesn't look as nice as it could. This would just be a case of redoing the material with better colours and tiling.
Model 5 - Laser Room
I did my best to replicate this scene from the film. In the end it turned out quite well and I am pleased with it.
 As a whole the room looks good. I particularly like the texture of the ceiling, lighting and the observatory room in general.
To improve on this I would add more things to the room. Some more objects could be made and put on desks, but I would mainly like to fill the floor space a bit better. Also, the chairs look terrible. They were built in about 2 minutes. This could easily be improved with more effort, but as they are just background objects, I felt no need to spend time on them for the purposes of this short animation.
Model 6 - Glass Shatter
This particular model / animation took a lot of time and independent learning, but in the end had a good effect. The glass material and daylighting system combined make it look even better.
To improve this I would have cut the glass into many more segments and in a more radial pattern to simulate a bullet smashing through better. As this was my first attempt at glass breaking, the limited amount of segments was enough. More segments would also vastly increase render times.
Model 7 - Ocean and Mountains
I can't take too much credit for these two. Although I did build and adjust them to my needs, they were a product of two great online tutorials. The links have been mentioned before in the blog, but here they are again.


Ocean:
http://www.3dtotal.com/team/Tutorials_3/3dsmax_water_surface/water_surface_01.php
[Internet] [Accessed 06/04/2011]
Mountains:
http://www.3dtotal.com/team/Tutorials_2/terrain/terrain_01.php
[Internet] [Accessed 06/04/2011]
As for the ocean, I would have perhaps liked the waves to have been a bit rougher. To improve this, I think there is an option in the parameters to define the wave height and speed.
The mountains look great, but perhaps the fog could be improved. I would have liked it to be an area of fog rather than just in the background. I think this is fixed by using 'volume fog' instead of 'fog'. I stuck with normal fog as the rendering time would have been increased a lot and I couldn't quite get it to look right.
Possibly my favourite model that I have done, the DB5.

To improve this model, I would first redo the front headlights. They just look too cloudy and should have a chrome trim. I could also use a target spotlight to produce actual light from them. I think the material used on the windows is too reflective, so I would make them more translucent by decreasing the reflection level.
Model 2 - Character
This model was used for Bond, then copied and adjusted for Goldfinger.

As for improvements, first off would be the body detailing. I don't like the shape of the jacket around the neck. Also, by modelling the character with baggy clothes, the biped didn't work fantastically. When the arms dropped to the side to walk they would intersect the body noticeably. To fix this, the character would be modelled 'naked' and clothes would be added later.
Model 3 - Gun
Another of my favourite models, just unfortunate that it can't be seen properly in the 2010 version of Max.

To improve on this model I would fix the handle. The darker grips are too flat with corners on the back. On a real gun, the grip is a more rounded shape to fit the palm. There are also a few minor smoothing errors. These would be fixed by just spending more time using smoothing groups.
Model 4 - Laser
The laser is animated in the first scene of my animation similar to the film.

As I was trying to stay faithful to the film, the red laser should be visible down the length of the machine. This would be fixed by making the cylinder inside the blue rings glow red like the laser beam. A simple fix, but I forgot to change it and it doesn't look bad as it is. I would also change the material of the wood on the table as it doesn't look as nice as it could. This would just be a case of redoing the material with better colours and tiling.
Model 5 - Laser Room
I did my best to replicate this scene from the film. In the end it turned out quite well and I am pleased with it.

To improve on this I would add more things to the room. Some more objects could be made and put on desks, but I would mainly like to fill the floor space a bit better. Also, the chairs look terrible. They were built in about 2 minutes. This could easily be improved with more effort, but as they are just background objects, I felt no need to spend time on them for the purposes of this short animation.
Model 6 - Glass Shatter
This particular model / animation took a lot of time and independent learning, but in the end had a good effect. The glass material and daylighting system combined make it look even better.
To improve this I would have cut the glass into many more segments and in a more radial pattern to simulate a bullet smashing through better. As this was my first attempt at glass breaking, the limited amount of segments was enough. More segments would also vastly increase render times.
Model 7 - Ocean and Mountains
I can't take too much credit for these two. Although I did build and adjust them to my needs, they were a product of two great online tutorials. The links have been mentioned before in the blog, but here they are again.


Ocean:
http://www.3dtotal.com/team/Tutorials_3/3dsmax_water_surface/water_surface_01.php
[Internet] [Accessed 06/04/2011]
Mountains:
http://www.3dtotal.com/team/Tutorials_2/terrain/terrain_01.php
[Internet] [Accessed 06/04/2011]
As for the ocean, I would have perhaps liked the waves to have been a bit rougher. To improve this, I think there is an option in the parameters to define the wave height and speed.
The mountains look great, but perhaps the fog could be improved. I would have liked it to be an area of fog rather than just in the background. I think this is fixed by using 'volume fog' instead of 'fog'. I stuck with normal fog as the rendering time would have been increased a lot and I couldn't quite get it to look right.
2011 to 2010 Conversion Errors
It has come to hand-in date again and I need to go through and outline all of the differences between my work done on the 2011 version of 3DS Max and the University's 2010 version.
For each model that has an issue because of the conversion, I will post two images. The first image will be of the working version from my laptop. The second will be the converted 2010 version.
Firstly, the model of Bond (Models > Person > Bond.max). Some sections are oddly warped and stretched while other disappear completely.
And finally, once again it is only the character model and gun that doesn't work, but the rest of the scene does. (Models > Goldfinger Text > Text with Person.max)
For each model that has an issue because of the conversion, I will post two images. The first image will be of the working version from my laptop. The second will be the converted 2010 version.
Firstly, the model of Bond (Models > Person > Bond.max). Some sections are oddly warped and stretched while other disappear completely.
 |
| 2010 |
 |
| 2011 |
Next is the scene where the bullet shatters the window (Models > Bullet Scene > Bullet Scene.max). Again, the issue is with the character model and the gun. Everything else more or less works.
 |
| 2010 |
 |
| 2011 |
 |
| 2010 |
 |
| 2011 |
Here, the car is warped much like the character model and the materials, particularly on the wheels, are not right. Other than that, the scenery works fine. (Models > Car Scene.max)
 |
| 2010 |
 |
| 2011 |
Same problem as above where everything works fine except the car. (Models > Car Skid.max)
 |
| 2010 |
 |
| 2011 |
The same problem has occured in the file containing just the car (Models > Car > DB5.max)
 |
| 2010 |
 |
| 2011 |
Below shows the same issue again where the car and gun are warped, but everything else works fine. (Models > Final Credits.max)
 |
| 2010 |
 |
| 2011 |
The Goldfinger character model has the same problems as the Bond one. The head is badly distorted and some parts have disappeared. (Models > Person > Goldfinger.max)
 |
| 2010 |
 |
| 2011 |
The gun is very broken. Vertices all over the place have been placed wrongly. (Models > Gun > Gun.max)
 |
| 2010 |
 |
| 2011 |
Same again where the whole scene pretty much works except for the character model. For some odd reason, the Goldfinger model seems to work well despite its original file having major errors. (Models > Laser Room > Laser Room.max)
 |
| 2010 |
 |
| 2011 |
And finally, once again it is only the character model and gun that doesn't work, but the rest of the scene does. (Models > Goldfinger Text > Text with Person.max)
 |
| 2010 |
 |
| 2011 |
Everything else contained on the disc contains minimal or no problems. However, all of the files throw up an error at the start. By clicking 'open' or 'continue' on any of the messages gets rid of these for access to the models.
4 April 2011
Final Animation
With all 7 scenes rendered to a standard quality, they are ready to be pieced together. Each scene was rendered to PAL 720 x 480 with default Mental Ray settings and a 'low' final gather level.
By using Adobe Premiere Pro, these scenes can be put together, have sound effects added and transitions included.

By using Adobe Premiere Pro, these scenes can be put together, have sound effects added and transitions included.

The 007 theme music was found at:
[Internet] [Accessed 01/04/2011]
The film quote and laser sound effect were found at:
[Internet] [Accessed 01/04/2011]
The film soundtrack was found at:
[Internet] [Accessed 01/04/2011]
The gun magazine loading click sound effect was found at:
[Internet] [Accessed 01/04/2011]
The gunshot sound was found at:
[Internet] [Accessed 01/04/2011]
The glass shatter sound was found at:
[Internet] [Accessed 01/04/2011]
Once it was all put together and the sound effects added, this was the outcome...
Animated Car
A scene in my animation requires the car I have built to drive through some scenery. To make this scene I imported my car and bullet into the mountain scene I had made before.

Firstly, a target camera is used to follow the bullet across the scene for a couple of seconds. By using autokey on the camera and bullet, they are both moved along the x axis. The bullet moves slightly faster so starts on the left of the frame and leaves to the right. As the bullet leaves the frame, the camera begins to target the moving car.
The car is animated by using a path constraint. This is done by drawing a line along the scenery then clicking the car. Going to animation > path constraint and clicking the line should move the car to the start of the line. By scrubbing through the timeline, the car should follow the line. At first, the car disappeared under the terrain at parts where the ground got higher. This was fixed by raising the points of the line above the ground. By clicking 'refine' in the line's parameters, more points can be added. This helped to make the corner smoother too. The car will now follow the new line.

By right-clicking the car and bullet, going to object properties and enabling motion blur, the final rendering looks a little more realistic.
Final Credits Scene
The last part of my 30 second Bond animation is of the car driving across the snow and revealing the promotional text for the film (along with my SID number). To do this I firstly imported my car into a new scene. The camera will remain static at a bird's-eye view as the car is animated across the frame.
Next, a plane was created that covers the entire camera view. This was assigned an image I created myself in Photoshop. The snow material bitmap I used for the background can be found at:
http://www.flixya.com/files-photo/T/a/r/Taraq196716.jpg
[Internet] [Accessed 30/03/2011]

This was scaled so the tyre tracks match the width of the car's which will be animated to move across it.
Finally, a plane that covers the Photoshopped image was assigned the same snow material as before so it blends in as it is placed as a covering above the Photoshop image. This is so the text can't be seen before the car has moved across it.

The car is animated to move from right to left over the snow plane with the text. As the car passes over the covering, the plane is animated to move along with the car, revealing the text below.
As an added touch, I imported my gun and cloned a couple of the bullets. A rigid body collection was made from the gun, bullets and ground plane. The plane was set to unyielding while the bullets were given a mass of 20 each and the gun was given a mass of 100. These techniques combined created the final effect.
SWOT Analysis
Strengths
For this module, I think my main strength is the ability to pick up the modelling aspect of 3DS Max quite quickly. I have used very primitive 3D modelling packages before which gave me a good understanding of the terminologies used, of how 3D space works and is converted into a 2D image through rendering.
Another strength is my enthusiasm for this subject in particular. 3D modelling has been something I would like to pursue in recent years, so I am doing my best to produce a great piece of work that I can be proud of. That enthusiasm allows me to put in plenty of hours of work at home in my own time without it feeling like a chore.
Weaknesses
A weakness in this project is having a fairly limited understanding of what the software is capable of. As time progresses and I spend more time using it, it does appear that almost anything is possible to create.
At the start of the project, the models I created were very basic and had problems in them. After learning much more about the program and how I could improve the models, I decided they weren't good enough and spent time going back to recreate them which took time.
Opportunities
Doing all the work in tutorials and my own time have been good for me to gain an understanding of an industry standard 3D package. Building all of these models also gives me the opportunity to go back and recreate them to a better standard. I have done this before, with particular reference to the gun and the car, but could keep going back for more and more improvements. This could hopefully be the start of a journey to a career.
Threats
The main threat I can think of is the reliability of the software. A couple of times I have set up a render and expecting it to take about an hour or two and right near the end an error message appears. "Mental ray has encountered a fatal error and must shut down" is not a good thing to see at 97% complete on a render that has been going for hours.
Another threat is that once a render has successfully completed I will notice some small error which is enough to make me have to go back to the scene to change it and re-render which wastes valuable time. This has happened once or twice, but is progressively less common as I get used to checking my work properly before starting the render.
One final threat is the fact that I have been working on almost all of my modelling and animation at home which is running the 2011 version of 3DS Max. I can save the files as 2010 versions so they work on the lab computers, but they do not convert very well. Materials and vertices are often completely wrong. I have been doing my best to show evidence of my own work throughout this blog as I know marking will be carried out on the 2010 version.
31 March 2011
Where the Ocean Meets the Sand Snow
By combining both the ocean and terrain objects I had previously made, a good looking coastline is made.

The daylight system creates a quite realistic view. Adding motion blur to the bullet which passes the camera also helps.

And here is the rendering
Ocean / Bullet Scene
Immediately after the scene from the previous post, the camera will follow the bullet across that ocean briefly seen at the end of the window shattering. I used the ocean scene I made earlier. Just to recap, the ocean material was made with 'arch and design', selecting the water template and adding an 'ocean (lume)' map. It is lit with a daylight system found under create > systems. The camera target and bullet are linked so it follows automatically.
Glass Scene
After the success of shattering glass, I needed to put that into a scene. Using my already-built ocean scene and intro title scene, I combined them to form this.
The camera starts face-on at the title scene. This scene is enclosed in a box away from the daylight system in place for the ocean. The light has given it a bit of a blue tint, but after all the hassle I went through to get it to look that normal, it will do. Normal and mental ray lights don't work well or at all with a daylight system.


The camera starts face-on at the title scene. This scene is enclosed in a box away from the daylight system in place for the ocean. The light has given it a bit of a blue tint, but after all the hassle I went through to get it to look that normal, it will do. Normal and mental ray lights don't work well or at all with a daylight system.


By deleting the side wall that has the window in it, I accidentally stumbled across this pretty interesting effect. The glass refraction makes the scene look like its in some sort of bubble. I decided not to keep this effect because it made the glass shattering look very weird.

Adding motion blur to the bullet gives this (admittedly abstract) scene a little realism.

Here's a low quality test render of the glass shattering.
And here is the full scene with good render settings.
30 March 2011
Tutorial 10 - 30/03/2011
Today is about making bipeds. Firstly, a basic man be built, but this character was downloaded as part of the tutorial. Next, a biped is placed by going to create > systems > biped. The biped should be made as close to the height of the character as possible. With the biped selected, go to the motion panel and activate figure mode. Now the biped can be positioned inside the mesh. Use wireframe view for this.
After all of the bones are positioned and sized appropriately, make sure to deactivate figure mode. Apply the physique modifier to the character and select 'attach to node'. Click the diamond near the biped's pelvis (com) and a dialogue box should appear. Click initialize and yellow stars should appear at the end of each limb and head.
When a bone is moved, there is likely to be stretching where a bit of the model is left behind. This is fixed by going to 'envelope' under the physique modifier and increasing the envelope of each bone by increasing the 'radial scale'. Once this is done, the character should move nicely with the bones.
Now just go back to the motion tab with the biped selected and activate footstep mode. Under footstep creation choose your walking mode then click 'create multiple footsteps...'. Choose the amount of steps and click OK. Then select 'create footsteps (append)'.
Finally, click 'Create keys for inactive footsteps' under footstep operations and thats it. For my video, I cloned the body to make three and gave them each a different movement style.

And now we've got three happy bipeds having a frolic in the field.
My earlier attempt using my own Bond model can be found in this very blog at:
http://alexchapman.blogspot.com/2011/03/rigged-woo.html
29 March 2011
Shattering Glass
As I need to send a bullet through a pane of glass in my animation and failing miserably using PArray, I looked to other methods. I found success with a box cut up using ProCutter and a rigid body collection for the impact.
Firstly, a box is created to the size and thickness wanted for the pane. In the front view using the line tool, draw out the shatter lines. This will be used to split the box into segments for shattering.
It looks something like this...


And here is the final effect.
Firstly, a box is created to the size and thickness wanted for the pane. In the front view using the line tool, draw out the shatter lines. This will be used to split the box into segments for shattering.
It looks something like this...

Those lines are then extruded (modifiers > extrude) and sized so they completely intersect the box. The extruded lines must come out either side of the box and extend past all sides of the box for it to work.

By selecting one of the extruded line segments and going to compound objects and selecting ProCutter, click the box. It should split the box into segments like the image below.

By selecting the extruded lines and right clicking > hide selection and then building a simple frame, the object below is made.

A bullet I previously made for my gun was then imported and autokeyed to animate through the 'glass'. Add the frame, glass pieces and bullet to a rigid body collection. Give the frame a mass of 0 and set to unyielding so it won't move at all. Give each glass fragment a mass of 5 and set to inactive so it only moves on impact. Give the bullet a mass of 20 and also set to unyielding and concave mesh. The gravity in Havok's parameters can be played around with too to make the glass pieces fall differently.
By adding a 'fracture' found on Reactor's toolbar, the glass panel will split more realistically when hit. Increase the energy loss to about 0.6. This will hold the pieces together just for a fraction of a second on impact so they don't explode out quite so violently.

Here is the animation...
With materials added, the cracks can be seen before the bullet hits so an identically sized but unshattered box is used. The unshattered box will be visible before impact then become invisible as the bullet strikes. The shattered box needs to be invisible first then appear on impact. This is done by opening the dope sheet (right click object > dope sheet) and going to the frame you want the switch to occur. Click the unshattered box and go to track > visiblity > add. Go to controller > assign and select on/off. Now select 'add key' and place one at the correct frame. This should make the line disappear to the right. Then the same method was used for each shattered piece of glass so the dope sheet looks like the image below.

And here is the final effect.
Nice.
Mental Ray Daylighting
As my final animation requires a scene where a bullet is followed over an ocean, I decided to work with lighting effects on my previously made ocean scene. To test out reflections and to just create a bit more of a scene, I quickly put together a basic boat.
With the boat, water and camera already in place from before, I set up a daylight system by going to create > lights > daylighting. By going to the modifiy panel of the newly created light, sunlight should be set to mr (mental ray) sun and skylight set to mr sky. Set position to manual also. The light should be in the centre of the water plane and shining down from above.
The colour and intensity of the sky can be adjusted with the Blue/Red tint and saturation options.


After adjusting various parameters and camera angles, this is the final effect I will use in my animation.

With the boat, water and camera already in place from before, I set up a daylight system by going to create > lights > daylighting. By going to the modifiy panel of the newly created light, sunlight should be set to mr (mental ray) sun and skylight set to mr sky. Set position to manual also. The light should be in the centre of the water plane and shining down from above.
The colour and intensity of the sky can be adjusted with the Blue/Red tint and saturation options.

To create a duskier scene, the Red/Blue tint and saturation is increased. This makes the sun glow more orange.

The scene can be made foggy by increasing the mr Haze option to about 2.0 and setting the visibility distance to about 100 to make it distant over the ocean. In mr Sky, the suns intensity can be increased by turning up the multiplier.

After adjusting various parameters and camera angles, this is the final effect I will use in my animation.

I was going to look at using Reactor to create the water so the boat realistically bobbed up and down, but due to deadlines closing in I thought I should get on with what already needs to be done instead of extra effects. Here is a rendered video of the scene.
Subscribe to:
Posts (Atom)